Martinstag Lanterns 2019

I am so excited for our Lantern Parade this year! It will be our second year parading the 1st – 4th-graders into the four pre-k/kindergarten classrooms. This year, the elementary school students made the most beautiful lanterns out of clay!

They started with a slab of clay. They rolled it out and cut a base. Then they drew designs of moons and suns and cut out stars.

Then we helped them roll the slab and attach it to the base:

They were fired in the kiln. Then the children painted them with glaze, and they were fired a second time. Meanwhile, the children strung beads onto wire, which we then attached to make handles. I’m so amazed by how beautifully they turned out!

Aren’t they spectacular?! They are on display at school until our parade on November 12th!

Story Listening: Sterntaler

2018-11-13 13.51.41-2

After talking about Martin’s Day, I always like to tell the story of Sterntaler – or Star Money. It is a fairy tale from the collections of the Brothers Grimm.

The story is sweet and goes along nicely with the theme of generosity and giving to those less fortunate. After the girl, who is alone in the world, gives away all her possessions, she is rewarded as the stars fall from the sky and become coins and she suddenly has a beautiful “Unterhemd” – a kind of slip – made of beautiful silk.

Preparing for Martinstag


2018-11-08 13.44.29

Now that I am teaching in pre-k through 4th grade this year, I wanted to celebrate Martinstag with a little parade through the school. It’s amazing how much back-and-forth planning it has taken to carve out 15 minutes of time to bring everyone together and make it happen!! But we did, and tomorrow is the big day!

To prepare, I told the story of Martin to the elementary students (1st – 4th grade) as a Story Listening lesson last week. I also introduced the story to the pre-k/kindergarten classes in English with the help of a board book.

Martin

I have been working with our fabulous art teacher to make lanterns in 1-4. We came up with a great idea! We bought plastic ornaments that look like a mason jar. Then cut strips of black and yellow paper to fit inside. We had a stash of chopsticks (donated by a middle school student :)) and yarn and beads. I brought in a variety of punches from our too-large collection.

Before the children started working, the art teacher had them gather around the table and talked to them about what they would be doing – and why. She asked them about the story I had told them. She asked them why we would have certain shapes, like a sun, a moon, and a star. My heart sang as the children answered! What is more gratifying to a teacher than proof that the children are learning?? 😀

Then they got to work. They punched shapes into the black paper. Then they put the black and yellow papers inside the lanterns. The art teacher tied the lanterns to the chopsticks with heavy yarn. Then the children cut yarn or ribbon to tie on as decoration and threaded beads onto them. They look amazing!!


2018-11-08 13.19.04

2018-11-08 14.39.50

As the children worked, we sang the songs. It was such a beautiful afternoon!

Tomorrow I will go back into the pre-k/kindergarten classes in the morning. They will make paper lanterns, as they have done in previous years. You can find the template and instructions here.

2017-11-06 09.09.12 - Copy

As soon as we finish in the 3rd class, I’ll go gather the elementary students. And we will parade through the pre-k/kindergarten classes with our lanterns while singing our two Martin’s Day songs. Stay tuned to hear how it all goes….

2018-11-08 14.40.45

Story Listening: The Legend of St. Martin

2018-11-06 14.34.03

On November 11th, children in Germany, Austria, and Switzerland will be celebrating Martinstag. We are planning our own little celebration at school with all the children from pre-k through 4th grade.

So of course, I had to tell a story about St. Martin. Legend has it that Martin helped a beggar who was freezing by cutting his cloak in two with his sword.

I told another part of the story in English. Martin had become a monk and was living in Tours. When a new bishop was needed, the people turned to “the good Martin”. But he was so humble that he did not want to be bishop. He ran away and hid in a goose stall. The people of the town went searching for him. They lit their lanterns to guide them through the night. But it was the squawking geese that finally gave him away! And he did then agree to become the new bishop.

I took out a few of the details to simplify the story in 1st and 2nd grade. They still got the idea!

2018-11-07 14.45.14-2

This story is available on the Great Story Reading Project 🙂

Martinstag Lied / Martin’s Day Song

I have big plans for Martin’s Day this year at school! Since I am teaching all the way up through 4th grade, I thought it was time to do a parade. That means that the children need to learn the songs!

So I made up some posters to help them learn the words to “Laterne, Laterne”. Last week, I used the word cards to teach the first four words. (You can find out more about how I used them last year in the post Martinstag in the Classroom, and you can download the cards in the post Der gute Martin.)

Now this week it’s time for them to learn the rest of the song.

You can download the posters for FREE here: Laterne Laterne Lied GitA

I also made up a coloring page for the children to take home:

I made up some posters for teaching “Ich geh’ mit meiner Laterne” but the images I found are copyrighted, so I can’t share them. However, there is a great coloring page that you can find at Teddylingua.

Martinstag in the Classroom: Part 3

As I mentioned in a recent post, I love teaching about Martinstag, because it embodies the spirit of giving and selflessness. In the past, I’ve taught about Martin in the German story hour and in the pre-k/kindergarten class. This year I finally got to bring it into the 1st and 2nd grade class. Each class is a little bit different. In this post I’ll tell you about what we do …

in Pre-K/Kindergarten…

This is also a mixed class of pre-k and kindergarten children, ages 2 1/2 to 6! I’m always amazed at how well it works to mix the ages of the children. The older ones make good models for the younger ones!

This year, however, we have a lot of younger ones. So after teaching my Martinstag lesson “upstairs” in 1st/2nd grade, I knew I had to make things extra clear and simple for the younger children.

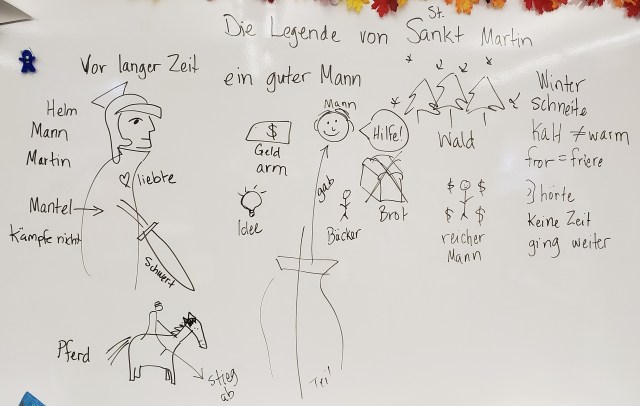
I began by telling the story of Martin in English, using the same book I had used with 1st/2nd: Das erste Buch von Sankt Martin by Erwin Grosche (Gabriel Verlag, 2017)

Martin

I had the story written out in English, but I only used it as a reference. I know it well enough by now! This book actually leaves out the more religious aspect of the tale – that the beggar was Christ, who later came to Martin in a dream. As we are not a religious school, I don’t feel comfortable teaching that part of the story. I focus mainly on Martin’s kind and generous nature.

Next I used the word posters to teach the words from “Laterne, Laterne”. This year I brought our au pair along to help with the lantern project. She also helped me by holding the Mond and Sterne, so the children could see all four images at once. It was much easier than me trying to flip through them as we sang!

You can download the posters – with or without words – in this previous post, Der gute Martin.

I just taught them the first half of the song. Then AP4 and I sang the rest of it (Brenne auf mein Licht, brenne auf mein Licht, aber nur meine liebe Laterne nicht). The children tried to follow along, and it sounded quite nice!

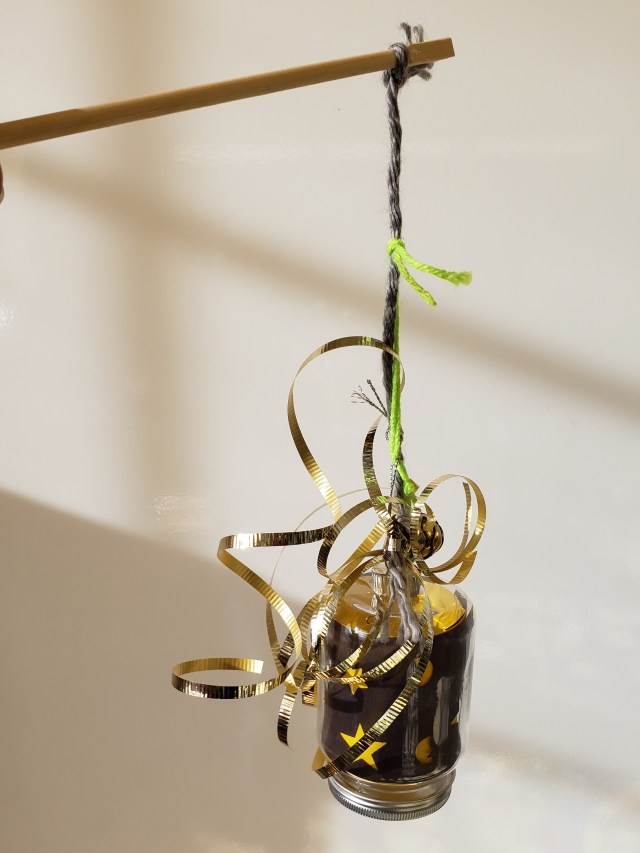
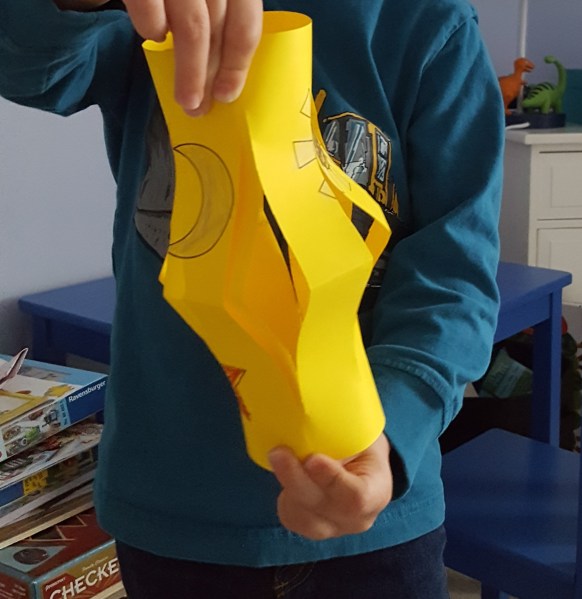
Finally it was time to make our paper lanterns. You can read more specifically about that part of the lesson and download the instructions and template here. I broke it down into simple steps and had samples of each step to show the children. They had three things to do:

  1. color the paper with the sun, moon, and stars (I print it on yellow paper, so it looks like it’s glowing!)
  2. fold the paper in half along the dotted line
  3. cut the “fringe” along the dotted lines

The teachers, AP4, and I did the stapling part to assemble the lanterns.

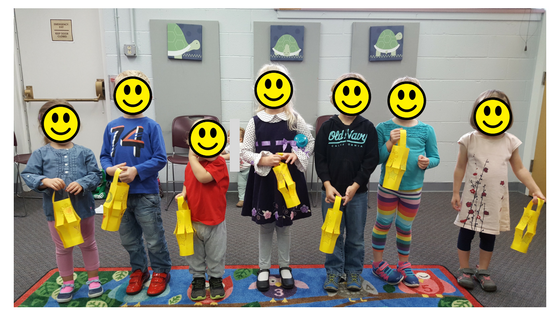
It was such a successful lesson!

Then we got to parade around the classroom and into the front hall. The children really enjoyed that part of it.

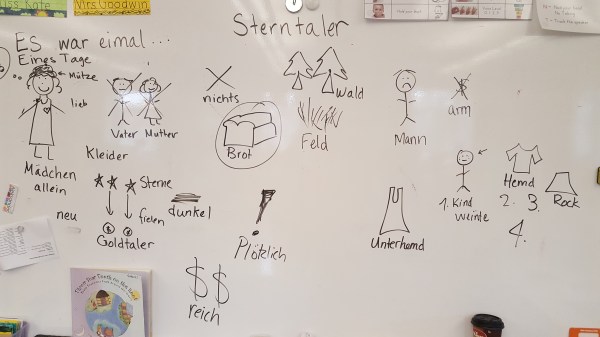
I decided not to use Story Listening and tell the fairy tale of the Sterntaler for this lesson. I wanted to be sure they knew the story of Martin and why we make the lanterns. And of course, they needed to learn the song for our little parade!

So that’s it! All three versions of my Martinstag lessons for 2017!

Viel Spaß!

Martinstag in the Classroom: Part 2

As I mentioned in a recent post, I love teaching about Martinstag, because it embodies the spirit of giving and selflessness. In the past, I’ve taught about Martin in the German story hour and in the pre-k/kindergarten class. This year I finally got to bring it into the 1st and 2nd grade class. Each class is a little bit different. In this post I’ll tell you about what we do …

in 1st & 2nd Grade…

This is a mixed class of 22 students. I couldn’t just jump right in with books and songs, like I did in Story Hour. Instead, I started with the story of Sterntaler. The children were outraged that the poor girl was all alone! And then shocked when she kept giving everything away! They were right with me the whole time 🙂  My board looked a little different, since they needed more help to understand it. But they had also experienced the method the week before when I told them Goldilocks. Here is a picture of my finished board for Sterntaler:

2017-11-03 15.06.15

After that, I read them the story of Martin, using the book Das erste Buch von Sankt Martin by Erwin Grosche (Gabriel Verlag, 2017). I used the book mainly for the illustrations and wrote out the story in English beforehand. I knew after hearing Sterntaler, that was probably enough German for that class (especially since it was 2pm on a Friday … the week of Halloween!).

Martin

Next I wanted to teach them the song, “Laterne, Laterne“. The beginning is so simple with its four words: Laterne, Sonne, Mond, Sterne. I knew they would need a little movement by this time, though, so I came up with a little game. I had printed out the vocab words on small cards. I printed enough so that each child could have a card. I just used my full-sized word posters and printed them 4-to-a-page. Then I laminated them and cut them down to size.

I handed the cards out to the children and then had them get into groups according to the picture – in order, of course! I had already gone over the words using my full-sized word posters. So they were familiar enough with the vocab. I called out a word, and that group had to raise their picture and say the word. I mixed them up and first. Then I told them to pay attention, because we were going to speed it up! And I went in order according to the song: Laterne! Laterne! Sonne! Mond! Sterne! They enjoyed the little game. And weren’t they surprised when I told them they had just learned the beginning of a song?!

You can download the word posters along with song lyrics in the post Der gute Martin.

Finally, it was time to make our lanterns! We did them a little differently in this older class. Although in hindsight, I’m not sure I would do it this way again!

  1. I gave them white paper cut down to size (without the strip for the handle) and let them color it however they liked.
  2. I gave them the lantern template printed on yellow paper (without the sun, moon, and stars – just the lines for cutting and folding) and asked them to cut the strip off the end to make the handle.
  3. They glued their white paper to the yellow template (I might do this step myself, in advance, if I try it again).
  4. They folded the paper (I was surprised how many of them did not fold on the line, but folded the long edge of the paper up to the line! If you read my post with instructions, you’ll see why I decided to give step-by-step instructions the next time!)
  5. They cut the “fringe”.
  6. We went around and stapled the lanterns together along with their handles

The lanterns turned out alright in the end. But it took so long that we did not have time to parade in the halls.

Then again, it was the last hour of school on a Friday. And did I mention it was Halloween week?? Scary stuff!! 🙂

Tutorial and templates can be found in the post Martinstag Lanterns!

Viel Spaß!

Martinstag in the Classroom: Part 1

As I mentioned in a recent post, I love teaching about Martinstag, because it embodies the spirit of giving and selflessness. In the past, I’ve taught about Martin in the German story hour and in the pre-k/kindergarten class. This year I finally got to bring it into the 1st and 2nd grade class. Each class is a little bit different. In this post I’ll tell you about what we do …

in Story Hour…

We read a couple of books, sing the traditional songs, and make paper lanterns. Then we get to parade through the library. This year, we even got to go into the bank next door! To read more about the books and songs, you can check out the story hour blog. They were all so proud of their lanterns:

2017-11-03 Martinstag post

I often like to tell the fairy tale of the Sterntaler. It’s the story of a little girl who is alone in the world and has next to nothing. And still, she gives away everything she does have. In the end, the stars fall from the sky and become gold coins, and she is wearing a beautiful new slip of the finest material. I usually read a little book about it, but this year, I chose to tell it as a story using the Story Listening method. Here is what my board looked like when I was finished:

2017-11-03 11.26.58

I wasn’t sure how the method would work in a room full of children who already know so much German – not to mention their German-speaking parents! But the children were mesmerized! And the parents really enjoyed it, too!

The next post on 1st and 2nd grade is coming…

Viel Spaß!


Martinstag Lanterns

Every year I like to share the celebration of St. Martin with the children I teach – in the story hour, in the pre-K/kindergarten class, and now in the 1/2 class I’m working with. It’s such a wonderful celebration of the spirit of giving.

Every year we make a simple paper lantern. This year, I learned a few things to make the project even better 🙂 Here are the children from Lesestunde with their lanterns:

2017-11-03 Martinstag postJust look at those smiling faces 😉

And here is what the template for the lantern looks like (front & back):

  1. Cut the long strip off the left side to save for the handle (follow the long line on the “back” image)
  2. Color the front – the sun, moon, and stars
  3. Turn to the back and fold the paper along the dotted line
  4. Cut “fringe” along the other dotted lines – stopping at the hash mark at the end
  5. Unfold the paper – fold it back the other way
  6. Wrap the paper to make the lantern, staple at the bottom, staple at the top along with the handle

First, I decided to get out my paper cutter and cut the handles off for the children. Having to first cut a whole strip off the paper and then make fringe seemed rather confusing. This way, they only have to worry about the fringe. It worked great!

Sedond, I am learning to give better – clearer – instructions! You would think this would be obvious. But it’s something you really have to think about! So I had Hippo help me make samples of our Laternen – one for every step (color, fold & fringe, unfold):

When I went in to his class, I had the samples all ready. So I could easily demonstrate the steps to the children. I showed them a colored paper. Then I showed them how to fold it. I had one folded already with one line of fringe cut. Then I showed them how to cut along the dotted lines to cut the rest of the fringe. That’s basically all they needed to do. We had four adults for 20 children in the room (I brought AP4 with me – another great idea!), so we each had a table of 5 children to help. When they were finished with their three steps, we folded the paper into the lantern shape and stapled on the handles. It was the most successful lesson I’ve ever taught for Martinstag!

2017-11-06 09.09.12 - Copy

See how the lantern “poofs” when you fold the the paper back on itself in the middle after you cut the fringe?

To download the instructions and template for the lanterns, click here: Martinstag Laterne (GitA)

For other materials, see my posts from previous years:

Viel Spaß beim basteln!