Jingle Bells

Today in story hour, we were celebrating Christmas! For our last song, we sang “Kling, Glöckchen, Klingelingeling”. But you can’t sing that without some jingle bells, right?! So we crafted our own little jingle bell instruments.

2016-12-16-09-08-39

For the craft, you only need 2 materials: pipe cleaners in two different colors and some jingle bells! Make sure your bells have a large enough hole at the top for stringing the pipe cleaner through.

Instructions:

1. String the jingle bells on to one of the pipe cleaners.

2. Twist the second pipe cleaner around the first one with the jingle bells.

3. Bring the ends together to make a circle. Twist the ends to close the circle. Then tuck the ends around the circle. Remember, pipe cleaners often have a sharp end, so try to tuck those points out of the way as best as you can.

Need the lyrics to the song? You can view or download them here: Weihnachtslieder. Also included are the lyrics for “O Tannenbaum” and “Alle Jahre Wieder.”

If you’re looking for some children’s books about Christmas, we read these three in story hour:

  • Frohe Weihnachten, kleine Tiere (arsEdition, 2015)
  • Weihnachten ist bald (arsEdition, 2010)
  • Wir freuen uns auf Weihnachten (Ravensburger, 2010)

Fröhliche Weihnachten!


Nikolaus Boots

Next week will be time to put out your boot for Nikolaus! Children in Germany put out a boot (not both – you don’t want to seem greedy!) on the eve of December 5th. Oh, and it has to be cleaned first! Nikolaus comes in the night and fills the boot with little treats, like nuts, chocolates, and mandarin oranges.

nikolaus-2015-12-06

Our Nikolaus also brought some lollipops and even some holiday pajamas! (Froggy was disappointed not to get a toy. Oh well!)

To help get ready for his visit, we do a Nikolaus craft. Cut a boot out of folded construction paper (red, if you have it), punch holes along the edge, and let your child use yarn to lace it up! We’ll be making these at Story Hour this year, too.

2016-11-28-13-08-00

This year, I thought we would add an extra step: decorating it with stickers and gluing cotton balls to the top for a “fur” lining.

Meanwhile, if you want to try it, you can download the template here in PDF: Boot Lacing

Fold your construction paper in half and place the template over it. Cut out the boot and then punch holes approximately where the dots are. Cut a length of yarn. Put one end through the bottom hole and tape it to the back. Tie a knot in the other end to make it easier to lace the boot.

wp-1480775179440.jpg

Here are some of our results from Story Hour. The kids got a little creative! I thought the cotton balls would go across the top. But someone had other ideas. Other children also used crayons to color on their boots.

Let me know how it works out!

Save

Learning Vocabulary with an Adventskalender (Advent Calendar)

Years ago when I was teaching at a German Saturday school, I wanted a fun way for my students to learns some Christmas vocabulary. I remembered making a paper chain advent calendar as a child and thought I could combine the two into a fun activity. For the past few years, I’ve been working on creating something similar for my kids. This new version includes printed stickers (that you make using round labels). Froggy has enjoyed it for the past few years. And now Hippo is old enough to get in on the action. I have the words printed on two different papers, so there won’t be any arguing over whose turn it is to do the calendar!


Here’s more on how it works:

Materials:

  • round white labels, 1 2/3 inches in diameter (compatible with Avery 5293)
  • white card stock, 2 pieces
  • tape
  • scissors or craft (X-ACTO) knife
  • letter-sized paper in holiday print, red and green, or whatever pattern/color you like, 2 pieces (I have a stack of 12×12 holiday crafting paper, and I just cut it down to size: 8½ x 11)
  • glue/tape/stapler

Instructions:

  1. Print the stickers on the round labels.
  2. Choose which version you want and print out the Adventskalender on the card stock.
  3. Tape the two pages together to make one long page.
  4. Carefully cut slits in the bottom page along the two black lines. (You can use an exacto knife or the blade of a pair of scissors.)
  5. Print the chain vocabulary words on patterned/colored letter-sized paper. *If using patterned paper, be sure to print on the back (white) side!
  6. Cut out the vocabulary words. A paper-cutter comes in handy here! Don’t worry if it’s not perfect. You won’t really see the lines!
  7. Begin making your paper chain, securing your loops with glue, tape, or a stapler. Be sure to save one strip to attach the chain to the Adventskalender. Be sure the word is on the inside and the decorative side is facing out! You can put them in random order or in alphabetical order (like the Adventskalender). Slip the last strip through the slits you made in the bottom of the Adventskalender and then through the first loop on your chain.

Hang up your Adventskalender! I like to use double-sided poster tape. Each day, have your child take off one strip. Copy the word onto the black space (if using the version without words). And match the sticker to the word!

I used to hang ours on the outside of the pantry door in the kitchen. But this year, I hung it up in the dining room next to our German calendar. I like that the kids can see it while they are eating at the table.

2016-11-27-11-29-00

Download all the materials in PDF here:

Stay tuned for a fun craft to celebrate Nikolaus!

Save

So Many Vehicles!

Today in Story Hour, we read and sang about vehicles … cars, buses, trains, excavators, fire trucks, tractors, submarines, ships, hot air balloons, rockets, and even soapbox cars!

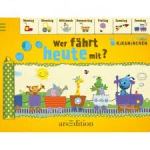
After reading our books, singing our songs, and doing a finger play, the children created their own little book based on Kikaninchen: Wer fährt heute mit? Each child had a booklet with each of the days and a place to enter which vehicle was used and who got to go along. They could fill in the information (with help from a caregiver) and then add the appropriate sticker to match. Later on, when Froggy (our 7-year-old) heard about the project, he wanted to do one, too. He was able to write the words himself, with some spelling help. Here are two examples:

To assemble the booklet, you print out the two pages, double-sided, and cut them in half. Then you can staple them together to make the booklet. (You’ll need a long reach stapler to get all the way to the middle of the booklet.) Next, print out the stickers on round labels (1 2/3-inch):

wer-fahrt-heute-mit-stickers-gita-docx-page-001

You can download both documents here in PDF format. Included in the download is a sheet with specific instructions.

The three books we read were:

  • Unser Ausflug. Wir fahren ins Grüne  by Chris Embleton & Louise Martin (Parragon, 2008)
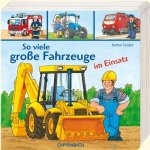
  • So viele Fahrzeuge im Einsatz  by Stefan Seidel (Coppenrath, 2011)
  • Kikaninchen: Wer fährt heute mit?  (arsEdition, 2011)

We also did a fingerplay (Fingerspiel): “Tatütata(click on the link to see a video of the fingerplay)

Tatütata – Wer kommt daher?
Tatütata – die Feuerwehr.
Tatütata – Es brennt ein Haus.
Tatütata – die Schläuche raus.

Wasser marsch!

And we sang two songs:

“Die Räder vom Bus”

Die Räder vom Bus, die rollen dahin, rollen dahin, rollen dahin
Die Räder vom Bus, die rollen dahin
Stundenlang

Die Türen vom Bus gehen auf und zu …

Die Wischer vom Bus machen wisch wisch wisch …

Die Hupe vom Bus macht “tut tut tut” …

Der Fahrer vom Bus sagt: “Fahrkarte, bitte!” …

Die Kinder im Bus machen “Blah blah blah” …

Die Leute im Bus, die schaukeln hin und her …

“Mit der Eisenbahn” (2010, von Ottmar Liedl)

Wir fahren heute Eisenbahn
und schauen uns die Welt mal an
Wir machen einen langen Zug
Platz für alle ist genug

Hallo, Du! Du bist dran!
Hallo, Du! Häng dich dran!
Mach die Türe zu
Der Zug, der fährt jetzt ab

Wir fahren heute Eisenbahn
und schauen uns die Welt mal an
Wir fahren jetzt in eine Stadt,
die den Namen Passau hat

Hallo, Du! Du bist dran!
Hallo, Du! Häng dich dran!
Mach die Türe zu
Der Zug, der fährt jetzt ab

Wir fahren heute Eisenbahn
und schauen uns die Welt mal an
Wir fahren bis zur Endstation
Da ist die schon

Save

Der gute Martin

Next week marks the celebration of St. Martin’s Day. I have to admit, while I lived in Germany, I never actually witnessed the children walking through the streets with their homemade lanterns on November 11th. I didn’t know about the special day until I was teaching in the States at a German Saturday School. It’s such a sweet celebration, though! Now I love to share it with the children at Story Hour and in Preschool.

To go along with the celebration, I have created a very simple lantern for the children to make. You can print it out, let them color the paper if they like, and then cut along the dotted lines and assemble it. You can download the template and instructions in PDF format here: martinstag-laterne

2016-11-04-11-10-34

A finished lantern from Story Hour

The songs that go with Martinstag are also very important. We always sing two of the most popular ones at Story Hour: “Laterne, Laterne” and “Ich geh’ mit meiner Laterne.” When I teach Preschool, I often just do the first two lines of “Laterne, Laterne,” since it is easy to learn and helps the children learn some of the more important vocabulary words: Laterne, Sonne, Mond, and Sterne. To teach the songs, I made up some vocabulary posters of these four words, a coloring page, and a sheet with the lyrics. You can download all of them in PDF format here:


Here’s an idea of what they look like:

When I teach Martinstag at Story Hour, I include several books. I have a few about Martinstag itself. This year, we’ll be reading Laterne, Laterne, da oben leuchten die Sterne by Dagmar Geisler and Rosemarie Künzler-Behncke (Ravensburger, 2009). I also like to read the fairy tale “Sterntaler” about the little girl who gives away all her earthly possessions to others in need and is rewarded in the end with a shower of coins that fall from the stars to last her the rest of her life. (I actually made my own book of this fairy tale, so I don’t have one to recommend here.) This year, I’m adding a beautiful new book (well, new to me!) called Der rote Faden by Anne-Gaëlle Balpe and illustrated by Eve Tharlet (Minedition, 2014). In this story, little Oli finds a red thread and by passing it on, he learns how little it takes to help others.

Save

Montags mit Mama: Pumpkins!

It’s that time of year! The leaves are turning fiery colors. The air is getting crisp. And it’s time to visit the pumpkin patch! We started the tradition 3 years ago. Our local patch is only about 10 minutes from our house. We can go on a hay ride or pull a Radio Flyer wagon out to the pumpkins. The boys always enjoy being pulled out to the pumpkin patch in the wagon.

We got some small pumpkins this year in addition to the bigger ones we would carve. So Hippo and I got out the paints and started decorating. We used circle-shaped sponge brushes in different sizes to start applying paint. Perfect opportunity to talk about shapes! Hippo started out by making a pattern. I was so impressed! But then he just couldn’t stop himself. So it turned into a lovely blue-green pumpkin. That’s okay, though. It’s the boys’ favorite color!

So our little activity allowed us to talk about fall, pumpkins, shapes, and colors.

Montags mit Mama: Color Mixing

Hippo has been so interested in colors lately, so I thought we would do some coloring mixing this morning.

Last night, I prepared the “experiment”. I filled an ice cube tray with water and then added food coloring in red, yellow, and blue. A few drops in each cube was enough to make our three colors.

This morning, we set up our table with the tablecloth, a plate, a fork*, and the colored cubes. I also drew up a quick sheet to see what Hippo thought would happen when we mixed the colors. He was pretty off! But that’s part of the fun 🙂

2016-10-04-13-42-53

First he guessed what each mixture of colors would make. Then we put one cube of each color on the plate and let him play with them. As they melted, the two primary colors combined to make the new secondary color. Magic! Then we filled in the Ergebnis circle with the correct answer. In the end, he mixed ALL of the colors together. You can imagine what happened then … a nice, muddy mess of colors 🙂

*He started out using his fingers to move the colored ice cubes around. Of course, his fingers turned red and yellow and blue, too! So we got out a fork for mixing the color cubes instead.

Here’s a blank form you can download in PDF: farben-mischen-gita. It looks like this:

farben-mischen-gita-page-001

Save

Montags mit Mama: Name Train

Our little Hippo started school last week! He is 3-and-a-half years old and will be going 3 half days (Tuesday, Wednesday, Thursday). I’m so happy – and relieved! – to say that his first week was a huge success! Froggy started 1st grade, and it was an easy transition. This morning, he informed Hippo that he wouldn’t go to school today, and Hippo completely slumped in his chair. Half of me wanted to hug him, since he was so sad, and the other half wanted to jump for joy that he likes school so much! 🙂

My goal is to do a project with Hippo on Monday mornings, since he isn’t in school. It’s a great way to spend some “quality”time together. When Froggy was 3, we used to do projects almost every day – crafts, art, science experiments, all kinds of fun things! And of course, I want to use it as an opportunity for a German lesson!

Today we borrowed an idea from Tippytoe Crafts: Name Trains! Here’s what we needed:

2016-09-12-10-56-05

  • print-out of a locomotive and some tracks
  • colorful squares of paper
  • letter stencils
  • scissors
  • glue stick
  • crayons
  • black paper
  • small circle punch
  • large piece of paper (or a couple of sheets taped together)

I could have had Hippo just draw train tracks, but he hasn’t been into drawing or coloring lately. In fact, his locomotive remains black and white!

First, we glued the tracks down. Then the locomotive. Next, we started sounding out his name. I think he knows his letters well enough. But I was surprised that he could figure out which ones we needed next. Each letter “car”was glued on to the train. Then he glued on the wheels. He could have colored the letters and decorated the paper, but like I said, he’s just not into it right now.

2016-09-12-11-15-27

After we finished the train, we practiced some color recognition. We even included braun and grau from the tracks!

While we worked, I played some German train songs, too.

  • “Die Eisenbahn, Die Eisenbahn” by Stephen Janetzko
  • “Mit der Eisenbahn” by Ottmar Liedl
  • “Der Schaffner hebt den Stab” by Lamp Leute (Die 30 besten Spiel- und Bewegungslieder, Vol. 2)
  • “Das Tschuu-Tschuu-Eisenbahn-Lied” by Hartmut Höfele
  • “Der Zug ist Weg” by Stephen Janetzko

The clipart for the locomotive was created by Charlotte’s Clips, and the tracks were created by Hidesy’s Clipart.

Back to School Traditions: Schultütte

Summer is really winding down. My boys go back to school right after Labor Day.

This is a big year for us: our little Hippo is starting school for the first time! He’ll be in preschool three mornings a week. And so it’s time to make a German Schultütte!!

The Schultütte is a wonderful German tradition for the first day of school. It’s a large, colorful cone filled with all kinds of goodies to celebrate that big day. You can put whatever you like into it. Maybe school supplies, stickers, a small toy, candy, or whatever your little one is into!

Froggy got one on the first day of preschool and the first day of kindergarten.

2014-09-03 08.09.37

I can’t remember exactly what we put in the Schultütte. Probably some crayons, pencils, erasers, stickers. I think there were some magnetic letters, a balloon, a maze book, and a small Lego toy, too.

This year, I thought I would enlist Froggy’s help in filling the Schultütte for Hippo. I plan to take him to Target next week and see what we can find. The red dot section is especially good for finding those small, inexpensive treats. The Dollar Store would be a good idea, too. We already picked out a small Lego toy for him: it’s a “Bagger” – one of his favorite things to spot while we’re out driving. And yes, he always says it in German  🙂

I found a great blog post with instructions on making the Schultütte and use it again and again each year. It only takes about 20-30 minutes. And you need just a few supplies – perhaps you already have them in the house: poster board, wrapping paper, tissue paper, tape/glue/staples, scissors, and of course the goodies to put in the Schultütte! The first part of cutting the poster board is a bit tricky until you start to do it  🙂 Check out the comments on the post for a few more tips.

UPDATE:

Hippo got his first Schultütte the day before school started. It was such a hit!

It was almost as big as he is! I was even able to reuse last year’s from Froggy 🙂  Just put on fresh tissue paper! Inside, he found crayons, pencils, colored pencils, a pencil case, glue stick, child scissors, stickers, car, toothbrush, dinosaur workbook, bouncy ball, and a small Lego “Bagger”. Lots of fun!

Olympic Games: LEGO World Flags

Earlier this month, I wrote a post about making Lego flags during the Olympics. Froggy not only enjoyed making the flags, but he was eager for me to create instructions for all the flags he made!

Once we got the hang of it, the basic striped flags were really easy. The hardest part was finding enough pieces in all the colors. We also managed to create some flags with plus-shapes, like Switzerland, Sweden, and Finland.

The flags are a great opportunity to practice geography and colors. But as I was creating the instructions, I realized you could also turn this into a math game. For the striped flags, we made them 12 across and 2 rows for each stripe. Challenge your little one to see how many ways s/he can make the row of 12 using pieces in different sizes! Froggy already made a change to the Germany flag, making it with just 15 pieces.

Or you can follow our patterns (click to download the PDF files):


2016-08-27 10.19.47

Here are 8 of the 10 flags. Froggy is going to rebuild France & Austria!