Martinstag Lanterns 2019

I am so excited for our Lantern Parade this year! It will be our second year parading the 1st – 4th-graders into the four pre-k/kindergarten classrooms. This year, the elementary school students made the most beautiful lanterns out of clay!

They started with a slab of clay. They rolled it out and cut a base. Then they drew designs of moons and suns and cut out stars.

Then we helped them roll the slab and attach it to the base:

They were fired in the kiln. Then the children painted them with glaze, and they were fired a second time. Meanwhile, the children strung beads onto wire, which we then attached to make handles. I’m so amazed by how beautifully they turned out!

Aren’t they spectacular?! They are on display at school until our parade on November 12th!

Schültüten!

The school year may have started a few weeks ago, but I just made Schültüten for the kids in my new German club. Luckily I only have 5 kiddos, so I didn’t have to make too many 😅

Our club is brand new. I started it, so that students could have the opportunity to continue with their German lessons in middle school (German only goes through elementary school. They switch to Spanish in middle school.)

But I digress! What is a Schültüte anyway? German children receive these colorful cones when they start 1st grade. They are filled with school supplies, small toys, and treats. I filled mine with:

  • German stickers (on sale at the craft store!)
  • pins that say “Deutsch ist wunderBÄR” & some other promotional postcards (from the AATG store) – the pin is already on Hippo’s backpack, so it’s not picture in the image below
  • small bags of Gummibärchen (some from AATG, some from Target)
  • mini RitterSport chocolates (I picked these up last time I was in Europe)
  • pencils and pens (from Teacher’s Discovery).
  • mini German flags (also from the AATG store)

2019-10-04 09.04.09

Even though my club kiddos are not just starting school, I thought they would enjoy getting a taste of this fun tradition. So I made small versions of the colorful cones using 12×12-inch printed cardstock. (If you’d like to make one yourself, you can find a link to a tutorial in this post. By using patterned cardstock, I eliminated the step of wrapping poster board in wrapping paper.)

The kids were very excited to receive their Schultüten. I made them wait until they got home to open them with their families 🙂

2019-09-30 15.55.59

Nutcracker Hampelmann

Have you ever seen a wooden jumping-jack toy? If you pull the string at the bottom, the arms and legs of the man go up! In German, it’s called a Hampelmann.

Well, our fabulous art teacher must be clairvoyant or something! Because she did a nutcracker project with the 1st and 2nd graders that looked like Hampelmänner! She was looking for a project to go along with my Nutcracker Story Listening lesson –  something for the younger children to do that would be a bit easier than making clothespin nutcrackers. But she wanted a project that was more than a simple coloring page. Perfect!

Aren’t they beautiful?!

It was such a great project that the 3rd & 4th graders created them, too, after they finished their clothespin nutcrackers.

The project can be found here and downloaded for free. Thank you, Brigid Ashwood, for creating such a wonderful project!

Getting Ready for Nikolaus

Tonight is the night to clean your boots and put one out for Nikolaus! So the children were busy in school yesterday, making crafts to get ready for him!

As usual, the pre-k/kindergarten classes laced paper boots. This year, we made them in black. And they decorated them first with white crayons. Here is the post with the tutorial and template to download. And here is what a few of them looked like:

2018-12-04 10.46.00 - Copy

I figured that the 3rd & 4th graders might not be too excited about a lacing activity 😉  And we only had 5-10 minutes for a craft. So I printed out some drawings of Nikolaus on cardstock and cut them out ahead of time. Then I found cute little take-out boxes at the craft store. After I told the story of Nikolaus und die drei Töchter, the children went to their desks to color the little Nikolaus figures. Then they got out the glue sticks to glue them on to the boxes. We’ll see if Nikolaus leaves something in them tonight?!

I can’t provide the template, because it is a copyrighted clipart image. I got this one as part of a clipart package that is actually about Sinterklaas 😉  But you can do a quick Google image search to find one of your own.

Homemade Gifts from the Kiddos

I love when my kids can make something homemade to give as a gift to family and friends. This year, Hippo decided to give artwork.

I cut out some trees, and we taped them to a larger paper. For his first try, he did fingerprints in green, red, and yellow. But that was taking a long time. Especially since he changed colors a lot and kept having to wash his hands. Maybe if I’d only given him one color at a time!?

So we switched to pom-poms held by clothespins. That went a lot faster! He did several in under a half hour. Easy project. Easy clean-up! Beautiful artwork to give as Christmas gifts 🙂

I got the idea from A Dab of Glue Will Do. Hmm. Maybe if I’d followed the instructions a little more closely, the fingerprinting would have worked out a little better! I like how she shows to print around the tree first.

German Vocab Advent Calendar

Every year I make a paper chain advent calendar for the boys with 24 German holiday words. I updated the project this year. I tried to find words that capture the elements of a German Christmas.

Adventskalender stickers 2018-page-001

All of these images were created by the artist Ramona M. She has a lovely collection of clip art for holidays around the world. Last year I contacted her to see if she would add to her German collection, and she graciously did!

For instructions (with pictures) on how to make the Advent Calendar, go to this post. And here are the updated downloads for 2018 in PDF format:

I hope you enjoy this activity with your children as much as I do!

Clothespin Nutcrackers

I love working with other teachers! I was talking with the art teacher and told her that I would be telling the story of The Nutcracker as a Story Listening lesson. She was inspired to do a project with the students!

Yesterday the 3rd & 4th graders started working on clothespin nutcrackers. I was too curious to stay away, so I popped in at the end of class. Boy, was so impressed! I also learned that they’d had an interesting discussion about nutcrackers, their origins, and asked questions like why are they all men?

Here are some pictures of their works-in-progress.


You can see some inspiration nutcrackers in the back. And they were even drawing nutcrackers on the white board!

They were so into the project that they will be working on it for one – maybe even two – more weeks! I am definitely going in next week to get in on the fun!

UPDATE:

Here are some more pictures of the finished nutcrackers! Click on the images to get a closer look.

On the top left, you can see the materials set out by the art teacher. Lots of choices! Obviously, the big guy in the back is a store-bought nutcracker 🙂  But look at the details in the ones the kids made. I love the soccer guy! So much creativity!


Preparing for Martinstag


2018-11-08 13.44.29

Now that I am teaching in pre-k through 4th grade this year, I wanted to celebrate Martinstag with a little parade through the school. It’s amazing how much back-and-forth planning it has taken to carve out 15 minutes of time to bring everyone together and make it happen!! But we did, and tomorrow is the big day!

To prepare, I told the story of Martin to the elementary students (1st – 4th grade) as a Story Listening lesson last week. I also introduced the story to the pre-k/kindergarten classes in English with the help of a board book.

Martin

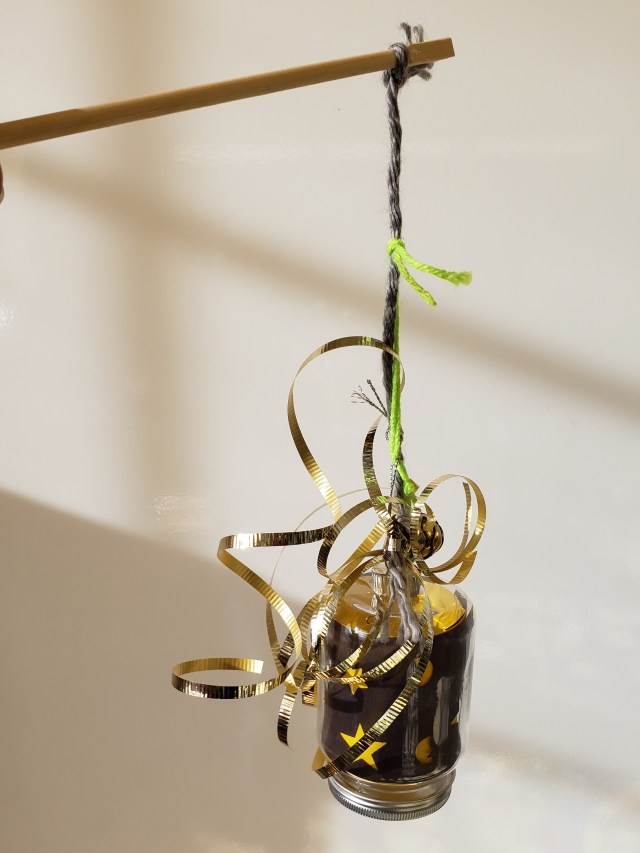
I have been working with our fabulous art teacher to make lanterns in 1-4. We came up with a great idea! We bought plastic ornaments that look like a mason jar. Then cut strips of black and yellow paper to fit inside. We had a stash of chopsticks (donated by a middle school student :)) and yarn and beads. I brought in a variety of punches from our too-large collection.

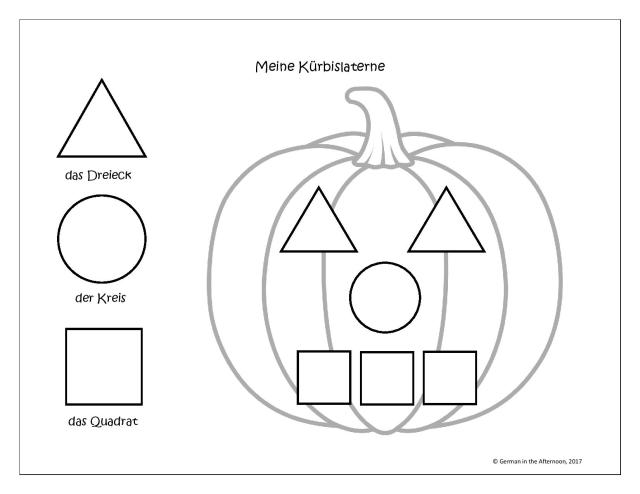
Before the children started working, the art teacher had them gather around the table and talked to them about what they would be doing – and why. She asked them about the story I had told them. She asked them why we would have certain shapes, like a sun, a moon, and a star. My heart sang as the children answered! What is more gratifying to a teacher than proof that the children are learning?? 😀

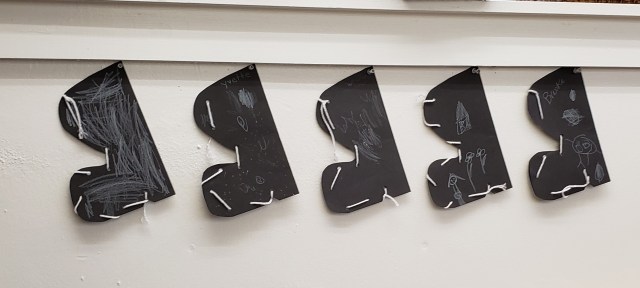
Then they got to work. They punched shapes into the black paper. Then they put the black and yellow papers inside the lanterns. The art teacher tied the lanterns to the chopsticks with heavy yarn. Then the children cut yarn or ribbon to tie on as decoration and threaded beads onto them. They look amazing!!


2018-11-08 13.19.04

2018-11-08 14.39.50

As the children worked, we sang the songs. It was such a beautiful afternoon!

Tomorrow I will go back into the pre-k/kindergarten classes in the morning. They will make paper lanterns, as they have done in previous years. You can find the template and instructions here.

2017-11-06 09.09.12 - Copy

As soon as we finish in the 3rd class, I’ll go gather the elementary students. And we will parade through the pre-k/kindergarten classes with our lanterns while singing our two Martin’s Day songs. Stay tuned to hear how it all goes….

2018-11-08 14.40.45

Easy Kürbislaternen for Pre-K & Kindergarten


I have posted before about making simple Jack-O-Lanterns out of orange paper plates. We made them in the Lesestunde.

In pre-k/kindergarten last year, I came up with a similar activity to practice shapes and a few parts of the body: eyes, nose, mouth.

I used my trusty orange paper plates (from Target) and punched a bunch of shapes out of black paper: circles, squares, and triangles. We talked about the shapes in class.

We also sang “Kopf, Schulter, Knie und Fuß” to practice the words Augen, Nase & Mund. You can find the lyrics over at Mama Lisa’s World.

Then I showed them the worksheet. They had to choose a different shape for each part of the face. Then look at the sheet to see how many of each shape they needed.

Meine Kürbislaterne mit Formen GitA-page-002

They could place the shapes on the worksheet first. Then they glued them to the orange plates to make their Kürbislaternen.

On the back of the worksheet, I also printed a coloring page:

Meine Kürbislaterne mit Formen GitA-page-003

You can download the worksheet and the coloring page for FREE here: Meine Kürbislaterne mit Formen GitA. The PDF file includes instructions.

Alles Liebe zum Valentinstag!

Looking for a quick and easy German Valentine card?

I like to give the preschoolers and kindergartners a little Valentine card. Just something simple. I print them out (4 to a page) and glue them to red or pink paper. Here is the one I made this year:

Alles Liebe zum Valentinstag blank GitA 2018

You can download the PDF here: Alles Liebe zum Valentinstag blank GitA 2018

Want to color the bear in yourself? Or print these for your little ones to make and color? Here is a version with an outline of the bear: Alles Liebe zum Valentinstag blank BW GitA 2018

Alles Liebe zum Valentinstag! Viel Spaß!